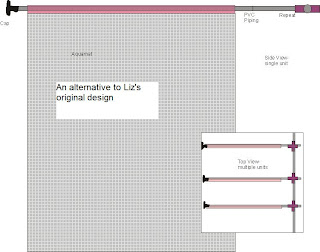
http://i710.photobucket.com/albums/ww101/theodore1800/design1v1.jpg
 It has many positive qualities and works as an excellent starting point (thanks, Liz!)
Main Structure.
Working from this design, I created a similar structure. This design consists of a less sturdy structure, as I use the PVC piping primarily to keep the aquamats from moving and to allow for easy removal of aquamats for replacement. According to http://www.nurturetech.net/aqua.htm, aquamats are equipped with ballast bags to keep them in place, but the PVC structure could allow several aquamats to be removed from the pond at the same time. This structure, consisting of a primary pipe paralleling the side of the effluent canal and perpendicular secondary pipes that the aquamats slip over, is attached to bank of the canal by ropes. One end of a rope would be tied to the primary pipe, and the other end would be tied on a stake on the side of the canal. This means the entire structure can be removed.
Details.
Each unit stemming from the primary pipe is connected by a tee and consists of one PVC pipe, one aquamat, and one cap. The PVC pipe length is slightly longer than the top of the aquamat. For the present, my idea for attaching the aquamat to the pipe would be to fold the top over to create a tunnel. I still need to work out exactly how this could be done, one option would be to sew this pocket in the aquamat; another option would be to use some kind of adhesive or pin to secure this tunnel. The aquamat would be kept from sliding off the PVC pipe by the cap. The top of each unit will be roughly equal to the surface of the water because of the floatation element associated with the aquamat.
Removal of substrate.
This design offers several different options for removal of organisms. I will briefly outline a few of them (discussed in our latest inventor’s club), and eventually follow up with more details.
1. Remove the entire structure and place in shrimp pond. Pros: this way we can utilize organisms growing both on the aquamats and the primary pipe. Cons: time must be allowed for the shrimp to eat off the structure
2. Remove entire structure and strip organisms by hose or rake. Pros: allows for faster cycle than in option 1. Cons: labor
3. Remove aquamats only and strip organisms by hose or rake.
4. (Inspired by Mr. Smith) Leave entire structure in the water, and move down the middle of the canal scraping all of the aquamats in sort of one swoop (this would only work with careful spacing of the aquamats, and we would have to develop a way to collect the substrates in the water). Pros: quick and dirty, Cons: we need to look into this further to be more specific. Hard to describe, so included a brief video demo- the spatula with basket represents the scraper tool (more on that later), the sticky notes are aquamats.
Pictures
Apologies for the strange model. PVC pipes represented by chopsticks, caps by pencil toppers, aquamats by cut paper, water by blue towel, rope by red yarn, PVC tees by masking tape.
http://i710.photobucket.com/albums/ww101/theodore1800/design1v2.jpg


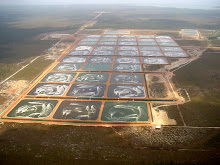
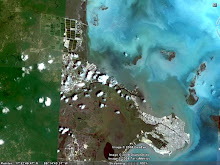
http://i710.photobucket.com/albums/ww101/theodore1800/Overview.jpg


