Friday, March 26, 2010

Testing Plan

We want to estimate the growth curve for the purpose of:
1. Having some hard data proving that our material actually promotes growth
2. Estimating the growth curve on our belt design to determine optimal frequency of harvesting
This test being done in Illinois as well as Belize is helpful because Illinois testing will serve as a template for Belize testing: we can modify test design based on what did or did not work, and have an estimate of what the curve will look like (i.e. how long the exponential phase of growh is in comparison to the stationary phase). It will also be interesting to compare how the apparatus will grow algae in different environments.
(Typical growth curve for Tetraselmis suecica.We expect a similarly shaped curve, but our scaling will be slightly different. Source:http://www.fao.org/docrep/007/y5720e/y5720e08.htm)

Some basics about the test:
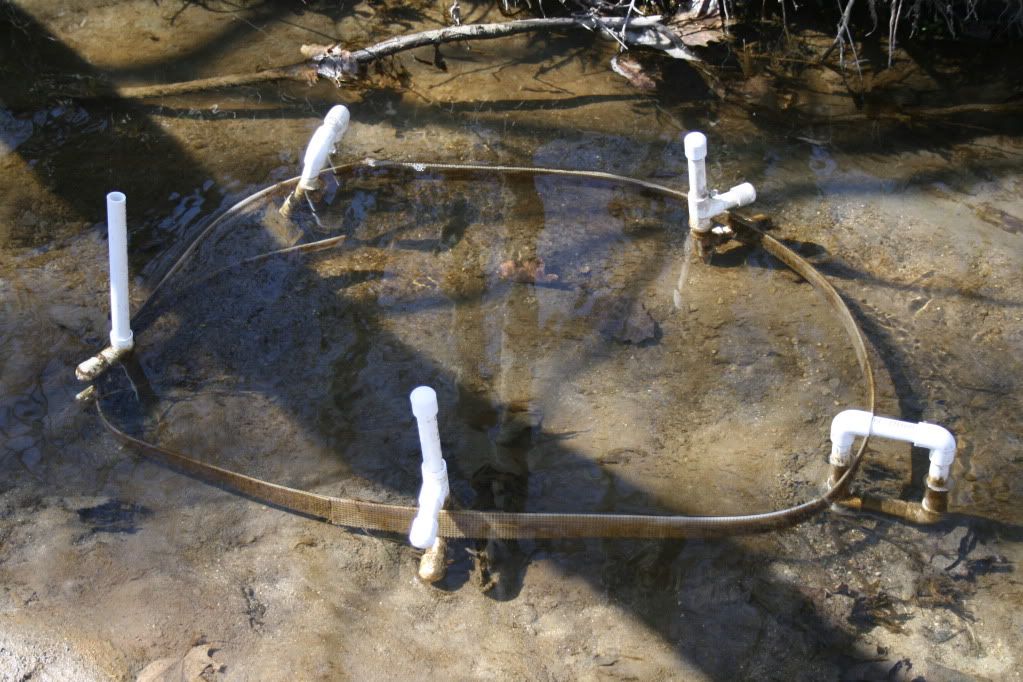
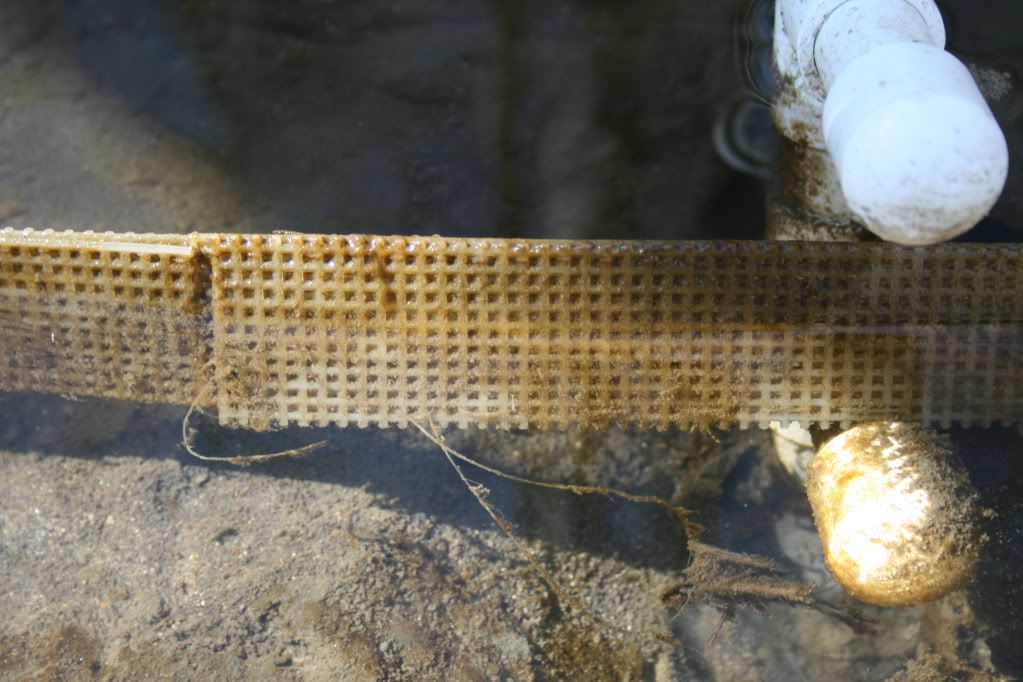
Algae harvest will be done using a single nail brush, not a harvesting mechanism (why? 1. our belt design was ready before the harvester is ready, 2. we don't want to be able to attribute error to inconsistency in harvest. this is a growth test, not a system test)
The data we aim for is actually a graph [img]. We'll be plotting grams of dry mass per square centimeters of belt against elapsed time (since last harvest) . Collection will occur at two day intervals at roughly the same time (in the morning). We divide the belt up into ten sections from which we harvest at scheduled intervals (so that our data will be spread out evenly).
Testing time is continuous. Although we will have the minimum useful data set by April 16th, we plan to either continue testing or launch a new round of testing using the harvester we eventually plan to implement.

At each harvest time:
0. Weigh watch glasses
1. Collect from the sections appointed for the day using a nail brush. Collect entire wet mass in a watch glass. Record having harvested.
2. Situation 1: We are allowed to bring home electronic balance. We allow the wet mass to sun dry, and if that isn't possible, we bake the material. Either way, we end up with dry material, and measure the mass (subtracting the watch glass weight). Situation 2: We (carefully) bring the watch glasses into school, bake in the oven in the chem room, and measure dry mass (subtracting the watch glass weight).
3. Record on paper and excel. The excel document will create the graph.


Flaws:
This data is only useful for static water (as opposed to implementation near the control section with accelerated mass collection).
Imprecise. Continuous testing is impossible, human error unlikely but possible (inconsistent harvesting?)

Tuesday, March 23, 2010

Prototype testing in Illinois

Hello everyone! It looks like good progress is being made in Belize. I look forward to the results of the most recent installment.

Outdoor prototype testing has begun recently, and the weather has finally gotten warmer for good it seems. We took a pre-existing design and altered it to work in a creek. This is what it looks like.


This design can be scaled to fit basically any size/shape pond. The belt is a double layered plastic embroidery sheet, with cheesecloth between the two sheets. The things that hold the belt in place, I'll call them belt guides, are PVC and come in two different forms. The first kind is a complete square, to enclose the belt. The second has two prongs to guide the belt. The second type is more efficient.

The belt has been in the water for about a week now, and this is what it looks like up close.


After March 16's post, Inventors Club is going try to incorporate these control structures, because it seems we could get a lot of yield from this. We would need some sort of efficient harvesting method. The harvester for this belt design is coming on 3/31. I'm not the expert on the harvester, so when it's implemented I'll post pictures and explanations. It uses rotating nail brushes to remove algae.

I look forward to hearing some feedback on this design!

Sunday, March 21, 2010

The Interns Hit the Ponds!

Working under the direction of Inar Cayetano of Aquamar Shrimp Farm (on the left), Shamika Logan (middle) and Lisa Guttierez prepare and install AquaMats in a sedimentation pond to help trap additional nutrients and sediment.
Results will be posted soon.
Looking forward to meeting with the Uni High Inventor's Club soon to discuss progress!

Tuesday, March 16, 2010

Quick Lessons About Sedimentation Ponds


I'll try to make this brief and brilliant.

This is the control structure (dam) for a sedimentation pond. Shrimp farms use sedimentation ponds to trap water and let organic and inorganic particles "settle" to the bottom so they won't enter natural water ways. They are a good way to remove nutrients and they are where we plan to deploy the Inventor's Club invention to remove nutrients.

The control structure generally looks like some variation of the object above, with removable boards slid into slots in a concrete post holding back the water and creating the dam.

The water comes into the pond looking like this...


...and leaves the pond looking like this (much, much clearer).
And yesterday the water was that much clearer still, because we tried a little experiment with Aquamats. Inar Cayetano, the new environmental coordinator at Aquamar shrimp farm and myself, placed an Aquamat at the outflow of a control structure...and in SIXTEEN HOURS...on a completely clean Aquamat, we got THIS to grow....

Ladies and gentlemen...that is some serious biomass yield.
I'll try to post numbers soon.
While you are thinking about your designs, keep this little experiment in mind. This kind of yeild opens up some very efficient design possibilities.